Overview
Spending limits are security policies that allow users to control how much your app can spend on their behalf. When users connect to your app via Phantom Connect, they can set maximum spending amounts that are enforced on-chain.How spending limits work
Policy enforcement
When a transaction is submitted through an embedded wallet, Phantom follows a three-step enforcement process:- Transaction simulation: Phantom simulates the transaction to calculate its impact on the user’s wallet.
- Policy check: The simulated transaction is checked against the user’s configured spending limit policies.
- Approval or rejection:
- If the transaction is within the spending limit, it proceeds.
- If the spending limit is exceeded, the transaction is rejected with a custom error.
User control
Users have full control over how their spending limits are configured for your app:- Setting limits: During the Phantom Connect flow, users can configure spending limit policies.
- Updating limits: Users can adjust their spending limits at any time through their Phantom wallet settings.
Setting spending limits during the connection flow
When users connect to your app via Phantom Connect, they’ll see a permissions screen where they can review and configure the spending limit for your app: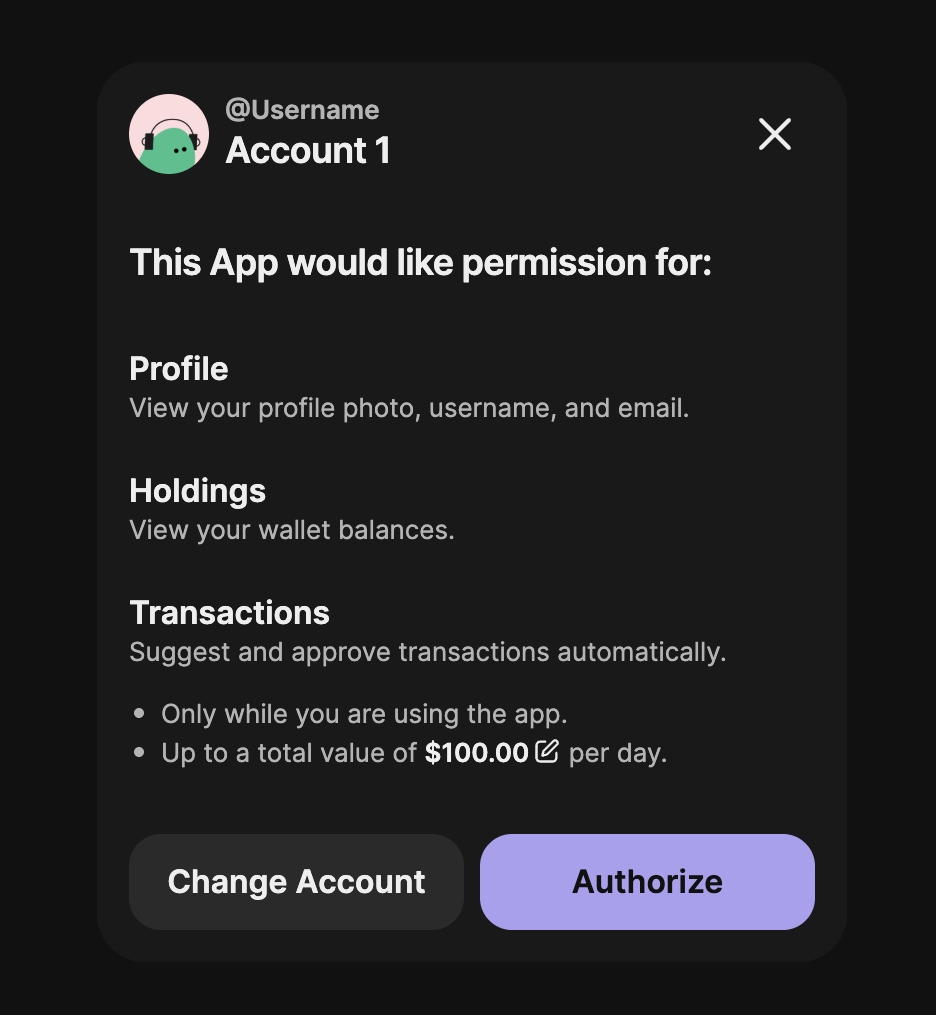
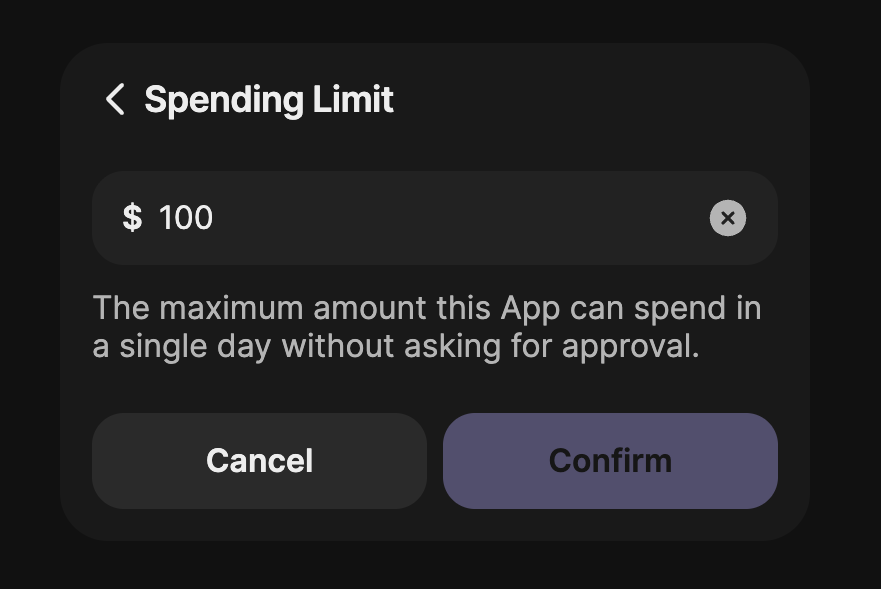
Viewing and updating spending limits in Phantom
Users can also view and manage spending limits through their Phantom browser extension: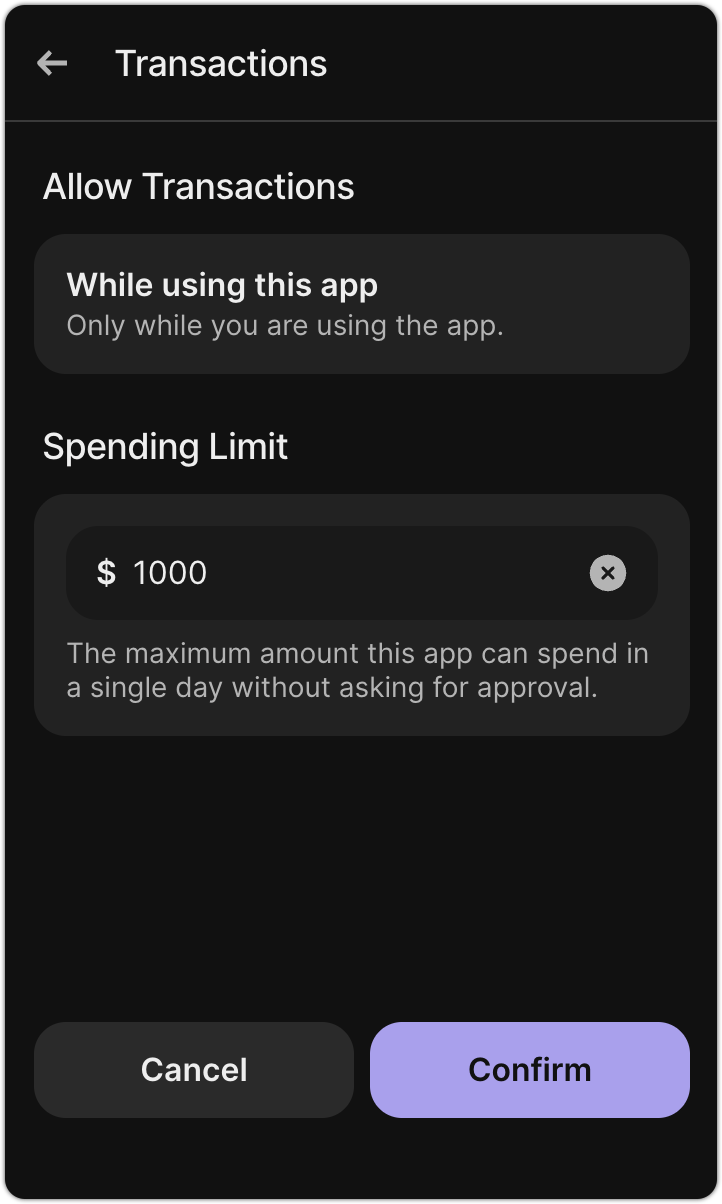
Transaction constraints
Phantom embedded wallets don’t support Solana features that execute multiple transactions together, such as Jito bundles or any mechanism that submits transactions atomically. Users must sign and send each transaction individually.Why this limitation exists
To enforce spending limits correctly, Phantom needs to simulate each transaction on its own to understand its financial impact. Bundles and parallel execution would prevent policy enforcement from working as intended:- It would make it impossible to calculate spending across multiple transactions accurately.
- It would introduce race conditions that could cause transactions to revert on-chain.
- Make the final wallet state unpredictable, breaking policy enforcement.
What this means for developers
This constraint prevents your app from using Solana features that rely on multiple transactions being sent together. These features include:- Jito bundles, where several transactions execute atomically as a group.
- Parallel transaction execution, where transactions are sent to the network at the same time.
- Atomic multi-transaction flows, where multiple transactions must all succeed or all fail.
Handling spending limit errors
When a transaction exceeds the user’s spending limit, the SDK rejects the transaction and the user must adjust their limit. For the Phantom Connect Browser SDK, which doesn’t include built-in UI, your app should handle this error gracefully:- Catch the error: Handle the spending limit error in your logic.
- Inform the user: Display a clear message that the transaction exceeds their spending limit.
- Provide guidance: Direct the user to Phantom settings where they can adjust the limit.
Ready to build?
Now that you understand how spending limits work, you can begin building your integration:Set up Phantom Portal
Create an app in Phantom Portal to get your App ID and start building
Choose your SDK
Select the right SDK for your app and start implementing wallet features